Eye dominance and the 10 points of archery
 Eye dominance
As illustrated below, hold your hands out at arms length
and with both eyes look through the hole formed by your hands at a
distant object.
Keeping that object in view, slowly move your hands
towards your face until they touch your face.
The hole formed by your
hands should be over one of your eyes. This eye is your dominant eye and
will control your aiming.
Another quick way to test your eye dominance is
to point your index finger at a distant object with both eyes open,
then
close one eye and see if your finger appears to move away from what you
are pointing at.
If your finger does appear to move, then the eye that you
closed is your dominant eye. Try again with your other eye and your finger
should not appear to move.

 10 points of archery
1. Stance

2. Nocking
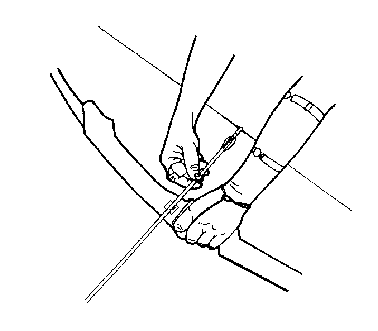
3. Bow drawing hand
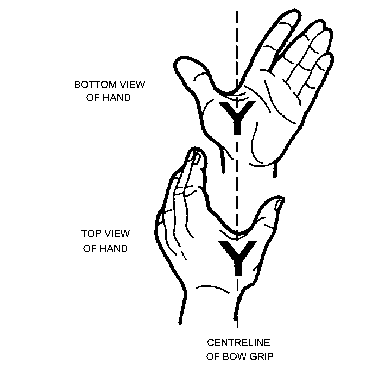
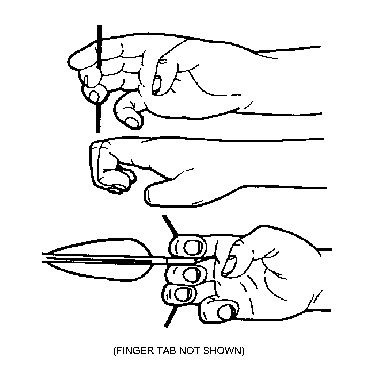
Place the bow hand into the grip of the
bow with the centreline of the V between thumb and index finger in line
with the centre of the bow as shown in the top view.
The base of the thumb muscle should rest on the centreline of the grip.
During the draw, the pressure should be taken on the thumb muscle and
directly into the wrist (low wrist position).
The thumb and fingers should remain relaxed. If a finger sling or bow
sling is not used, then the tips of the fingers are curled around until
lightly touching the bow. This will stop the bow falling out of the hand
on release.
A consistent hand position on the bow grip is necessary.
4. Bow arm and
pre-draw
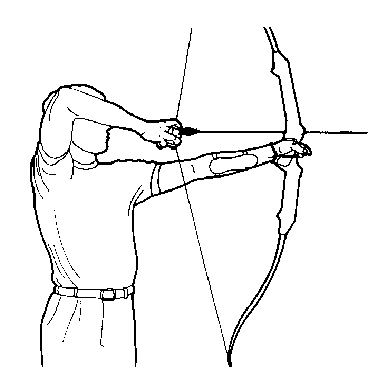
5. Drawing the
bow
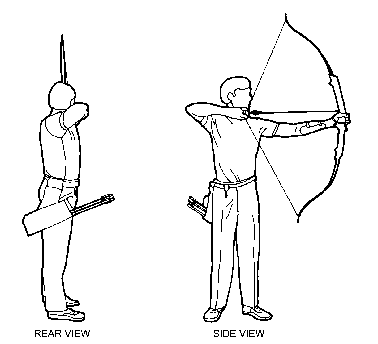
6. The anchor
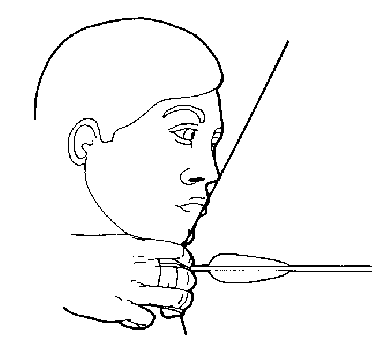
The
anchor is where the hand is positioned on the jaw and the bowstring
touches the face.
It is vitally important that the index finger is firmly placed against the
jaw, the thumb is tucked into the palm of the hand so it can be placed
firmly against the neck and the bowstring is firmly touching the chin (and
nose, if possible.)
The relationship between all these positions is important as it acts as
the rear sight, so it is vital that it be as consistent as possible.
It also acts as a consistent draw length position. Any variation in the
position will affect the amount of force the bow will impart to the arrow.
7. Holding and
aiming

Holding
is where the tension is maintained in the back muscles and then the bow
arm is moved to align the sight pin into the centre of the target.
As the sight pin is moved into the centre of the target, the string
alignment should be checked. String alignment, as shown in the picture on
the left,
is the alignment of the bowstring with the vertical alignment of
the bow and the alignment with the sight pin (as the bowstring is just in
front of the eye, it will appear blurred).
When the bow is held in the correct vertical position, then the bowstring
and edge of the bow will be parallel. If it is not, then the bow is tilted
away from vertical.
Just before full concentration is made on aiming, all the previous steps
should be checked to make sure that everything is in the correct position.
If any part of body feels out of place, then it is best to stop now, let
the bowstring down and start again, rather than make a bad shot.
When aiming into the centre of the target, it is natural for the sight pin to
move around, as the muscles try to hold it steady. With practise, aiming
will become more steady.
Move the sight pin up if the arrow lands high, move down if the arrow lands low,
move left if the arrow lands left and move right if the arrow lands right.
8. Release
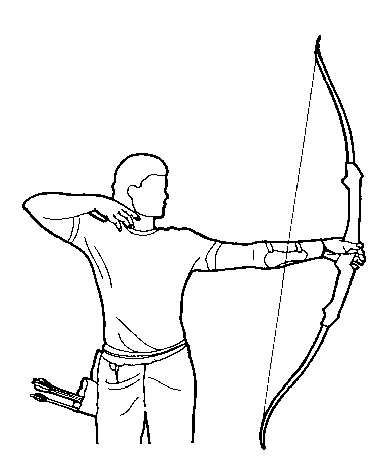
9. Follow-through

10
Relaxing
The
archer must relax after each shot to allow the muscles to recover from
their effort.
About 20 to 30 seconds should be enough time for the muscles to recharge,
ready for the next shot.
If not enough time is allowed between shots, then the muscles will tire
rapidly and may even become sore. Tired muscles will not be able to
perform consistently.


